Documents
Output Mapping Configuration
There are two ways to open the configuration tool.
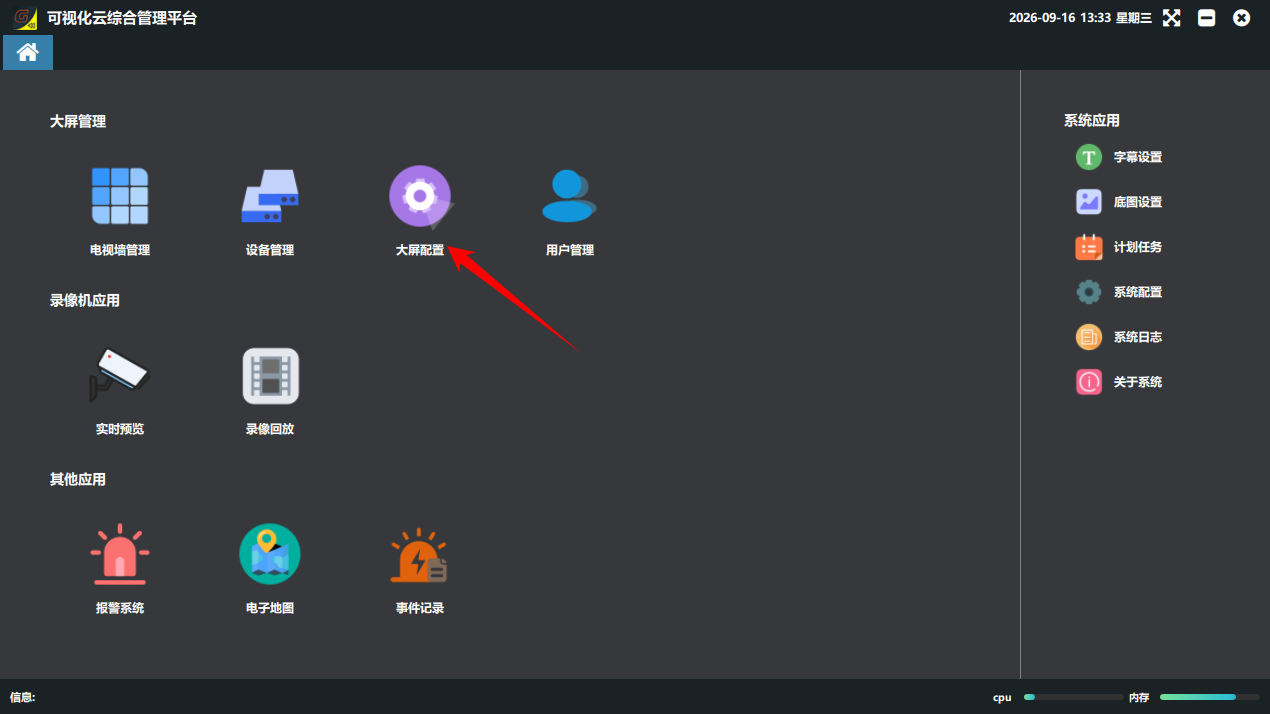
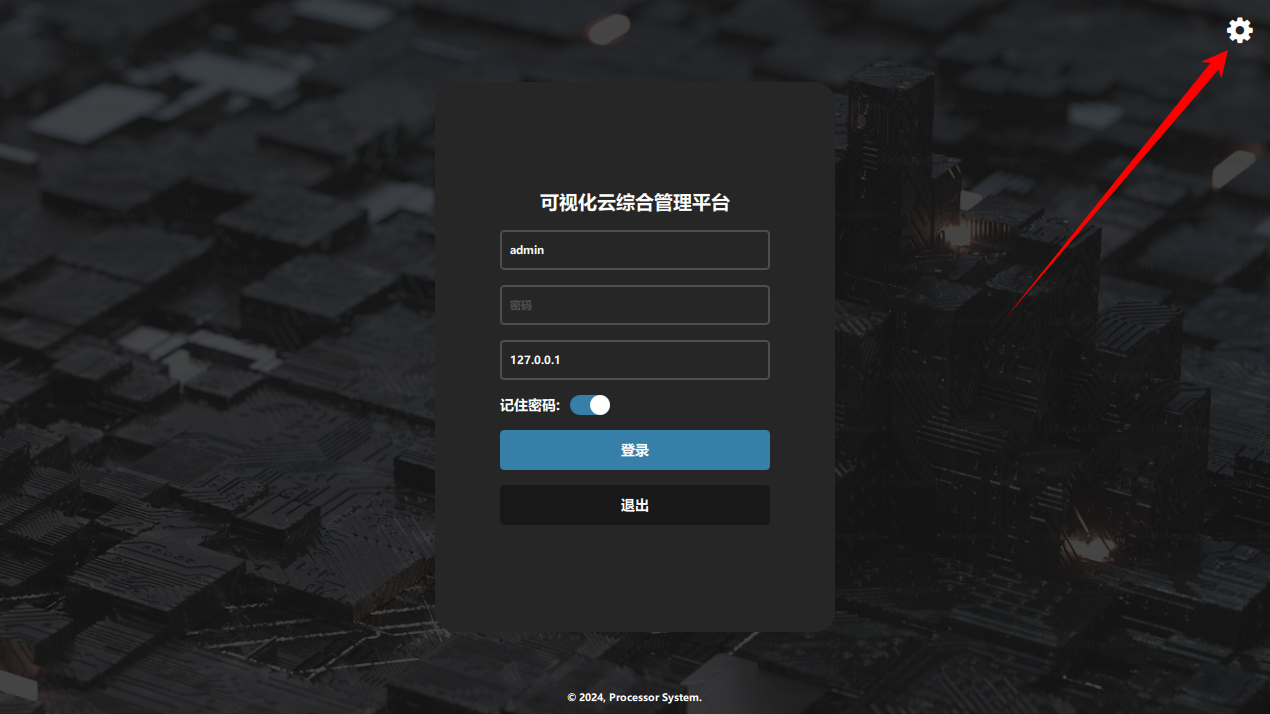
① Click the “Video Wall Configuration” button in the software, or use the settings button in the top-right corner of the login screen.
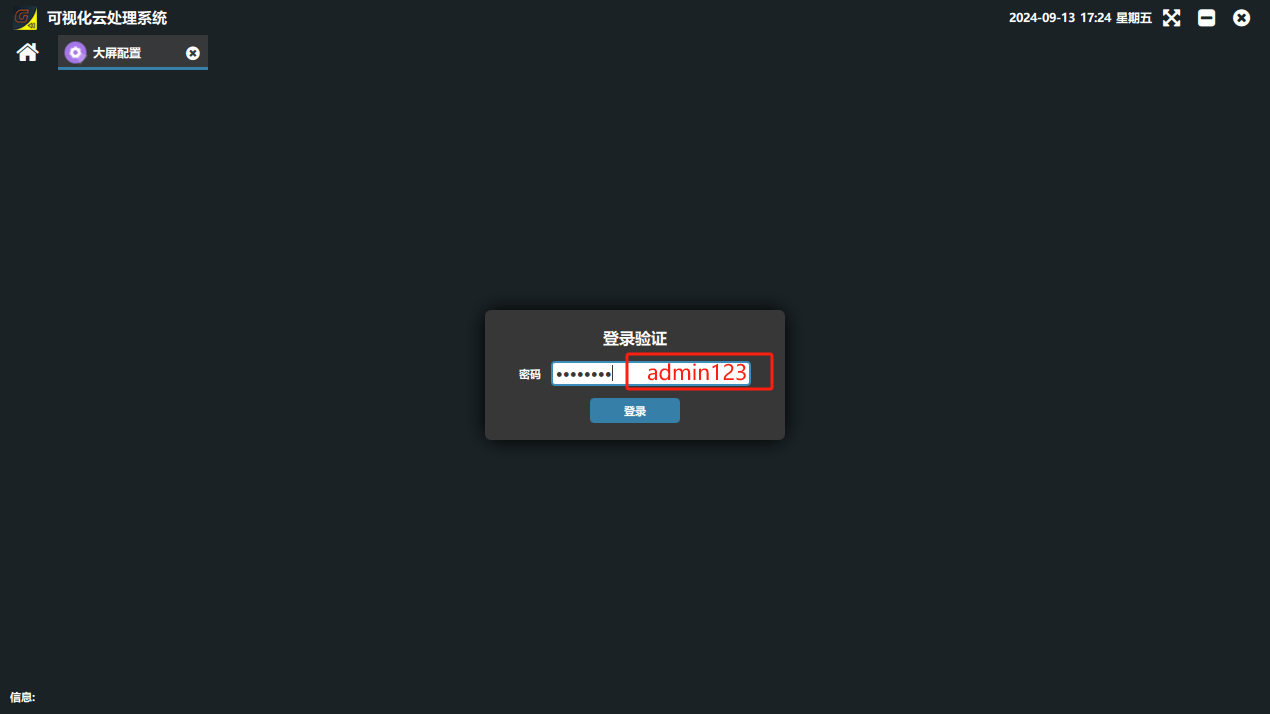
② 配置工具(Configuration Tool)login password: admin123
In the “Device Configuration Tool” window that opens, click “Search” to find the board IPs online on the local network.
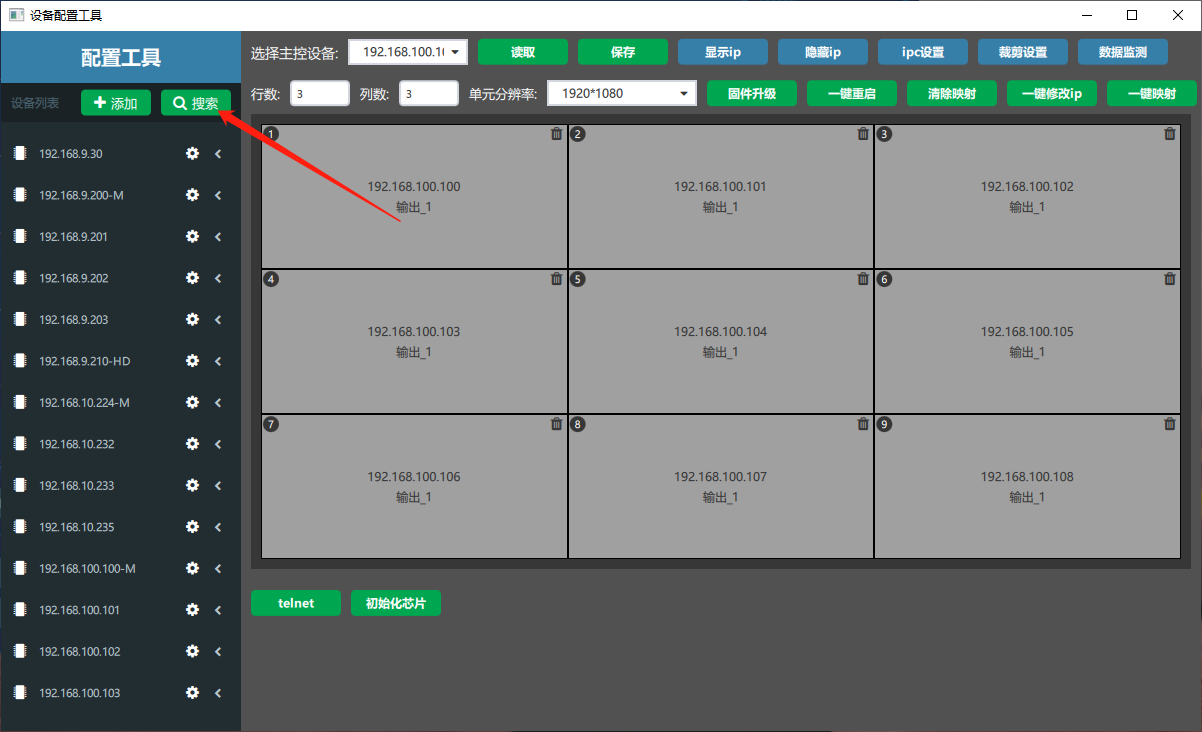
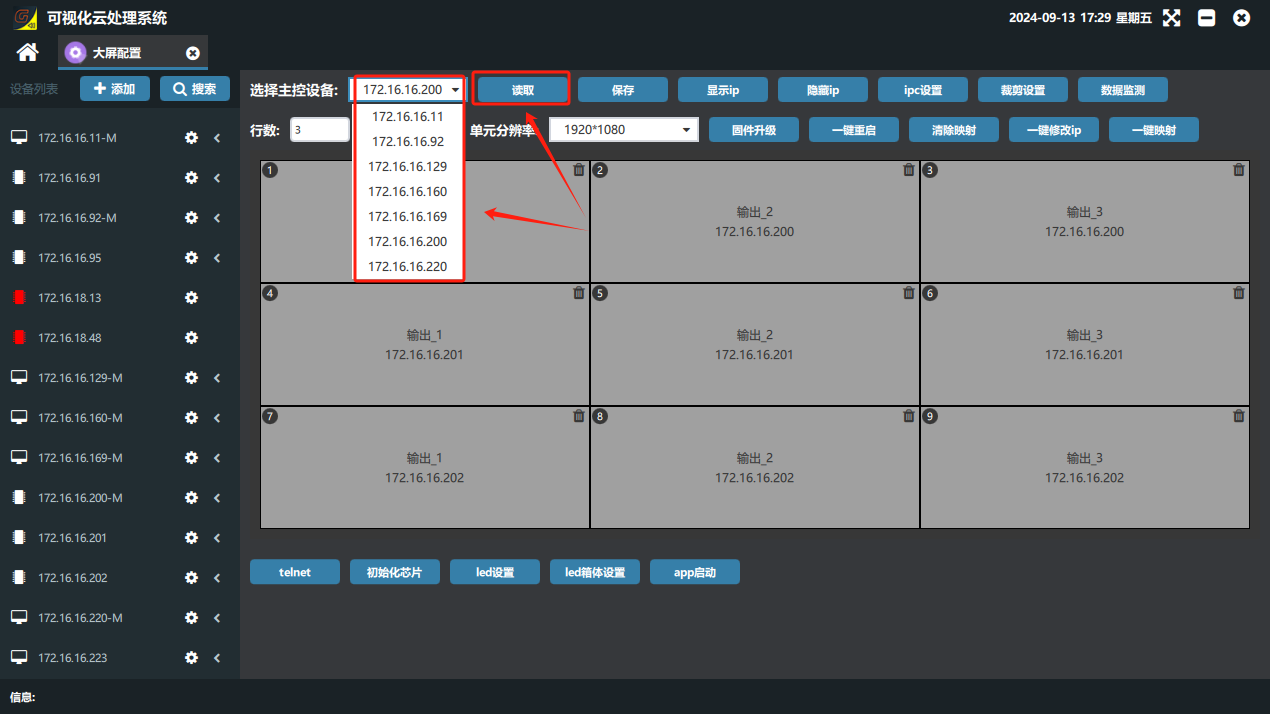
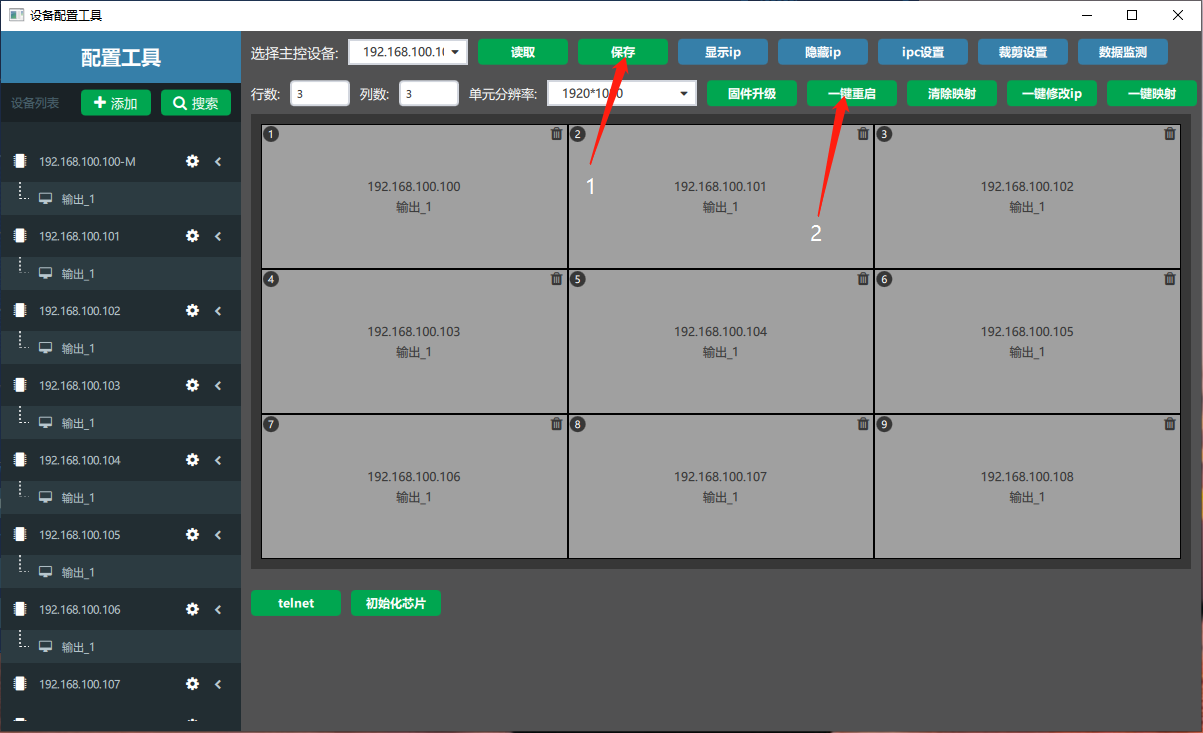
Click the “Select Main Control Device” drop-down, select the main control IP and click “Read” to read the current output configuration of the device.
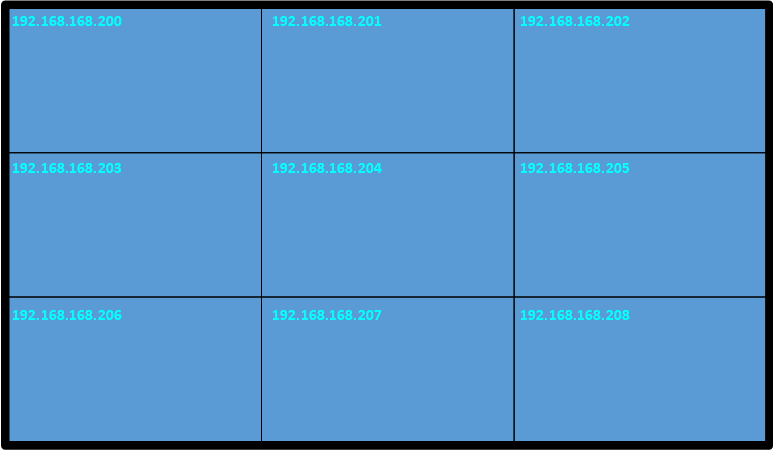
Click “显示 ip(Show IP)” and the IP of the connected board appears in the top-left corner of each screen on the video wall. (See the diagram below.)
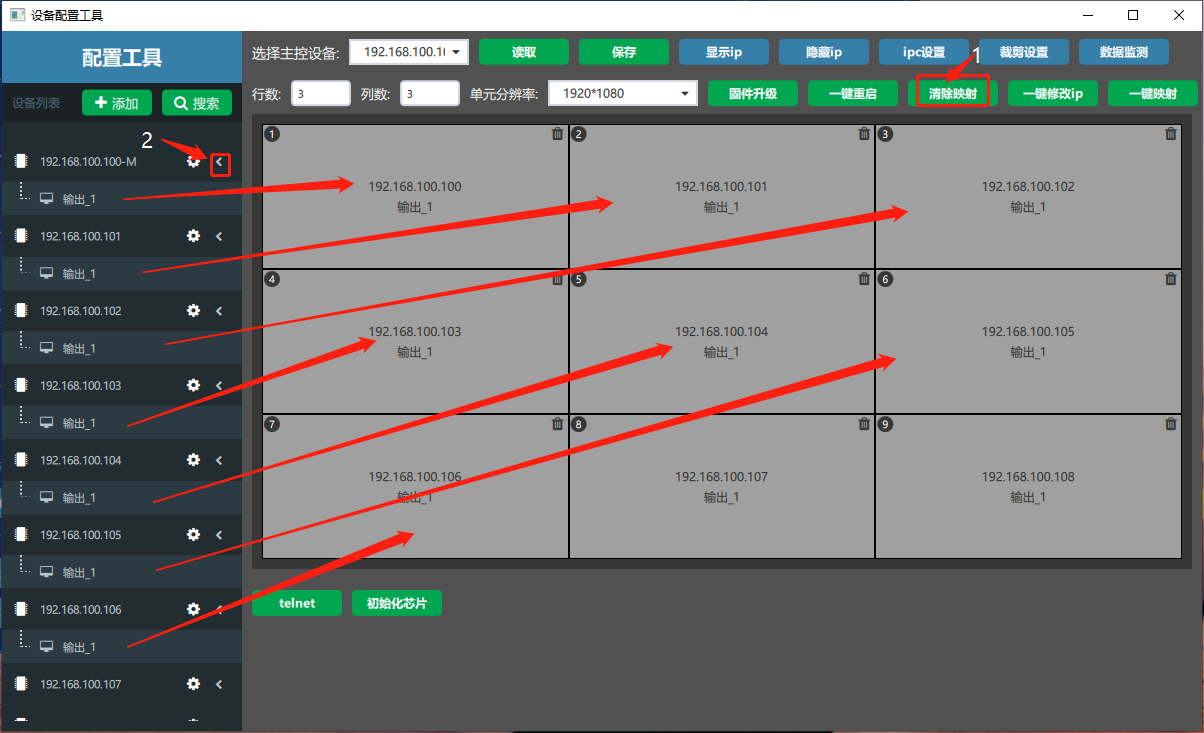
Click “清除映射(Clear Mapping)” → expand the small triangle “” after each IP in the device list → press and hold the left mouse button on each IP output and drag it to the matching position on the virtual video wall on the right, according to the IP shown on the video wall.

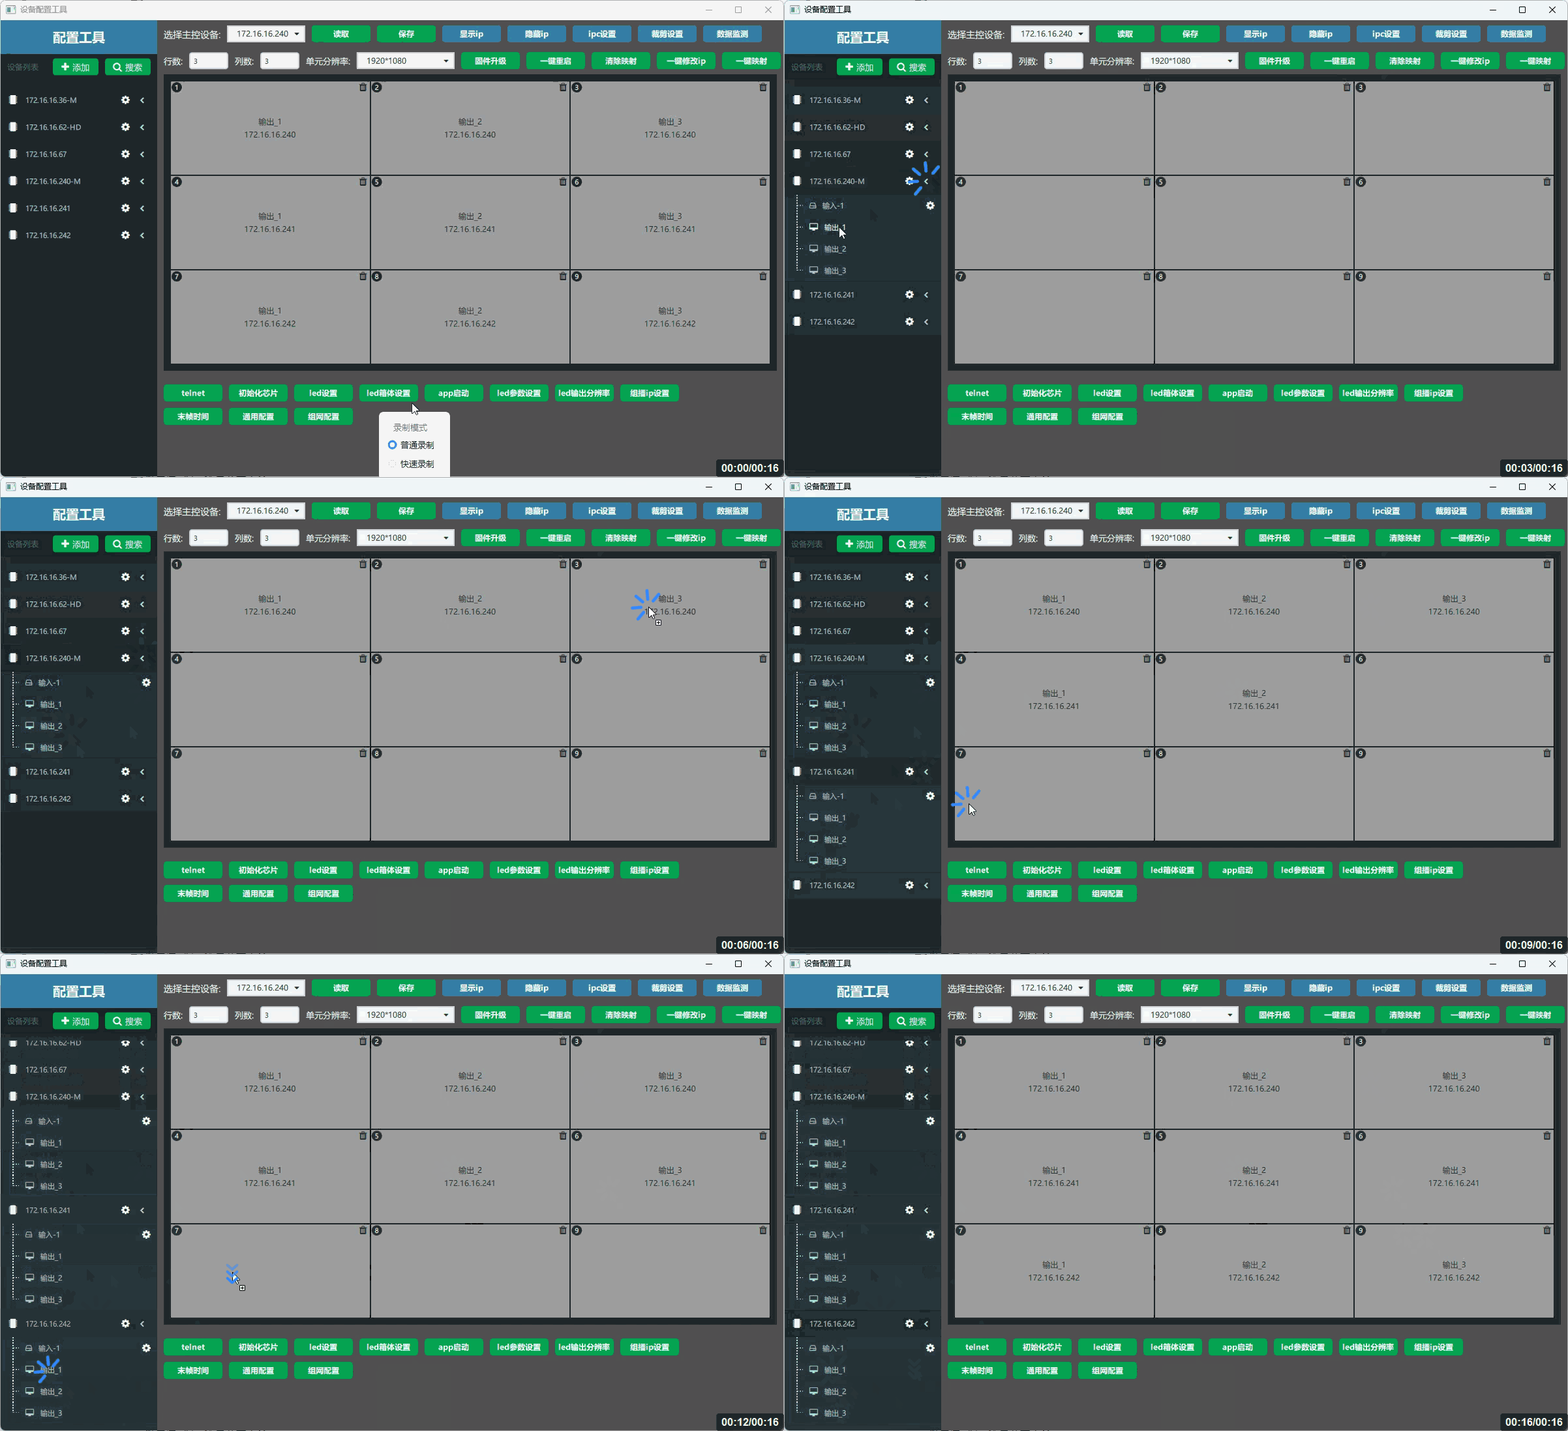
When all outputs are placed in their positions, click in order: 保存(Save)→ 一键重启(Restart All). (Note: after clicking Save you must click Restart All; if the device does not restart, the configuration does not take effect.)
Important: After you click “Clear Mapping” the video wall shows an abnormal image. Never cut power during this process; the configuration takes effect only after every output channel is placed, “Save” is clicked and then “Restart All” is clicked.
After the device restarts, reopen the software and log in to use it.
Did this page help you?One line of feedback helps us keep the steps accurate.