Documents
Scene Pre-layout
Use case: arrange the layout you need in the software without affecting the image currently displayed on screen; the image on screen changes only when you click Publish.
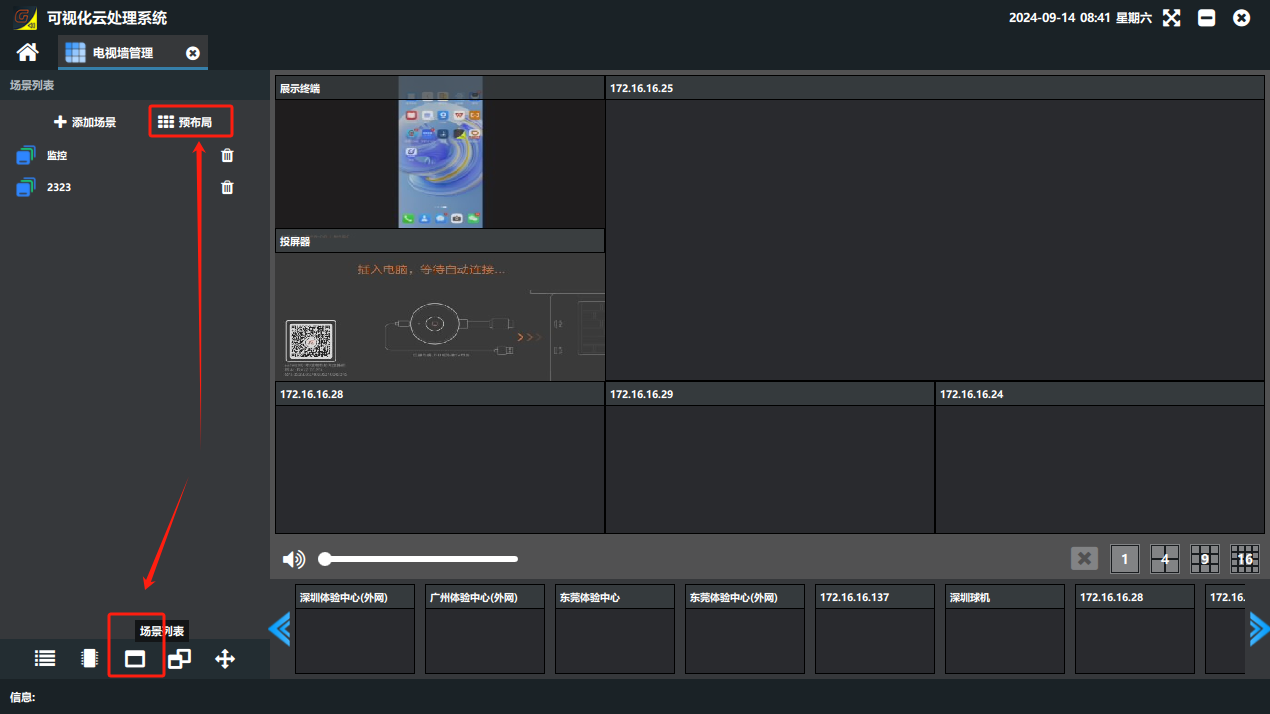
- Click the “Scene List” button in the lower-left corner of Video Wall Management and click “Pre-layout”.
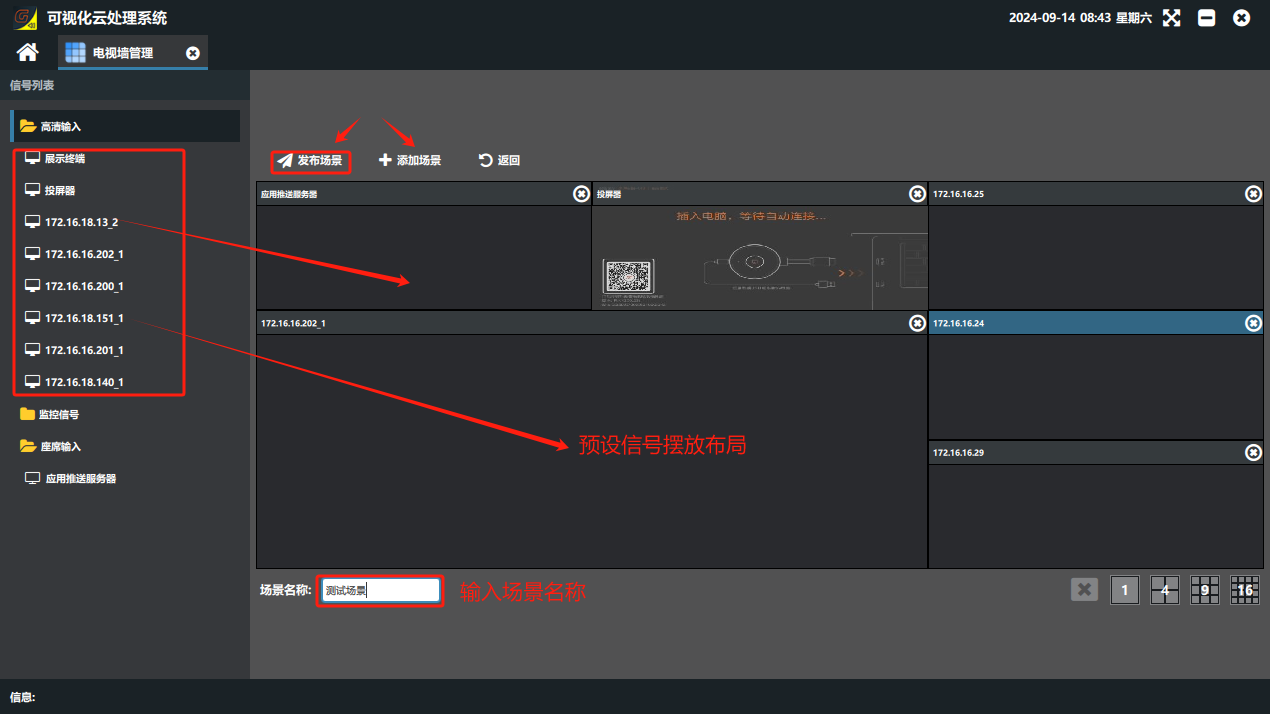
- In the pre-layout screen that opens, arrange the layout you need, enter a custom layout name and click “Publish Scene”: the video wall switches to the scene layout and the layout is saved in the scene list. If you only click Confirm, the video wall does not change and keeps the previous layout, but the new scene layout is saved in the scene list.
Did this page help you?One line of feedback helps us keep the steps accurate.