Documents
Add a Surveillance Signal
Signal addition always starts from “Device Management → Signal Data” on the software home page. (Note: before adding surveillance signals, change the device IP to the same subnet as the surveillance network; see “Card Settings → Change the Card IP” below for details.)
Important: Before adding surveillance signals, you must confirm that the board IP has already been changed to the same subnet as the cameras / NVR; otherwise the signal may be added successfully but no image can be decoded (the screen stays black). To change the board IP, see “13. 板卡配置(Card Configuration)→ 1. Change the Board IP”.
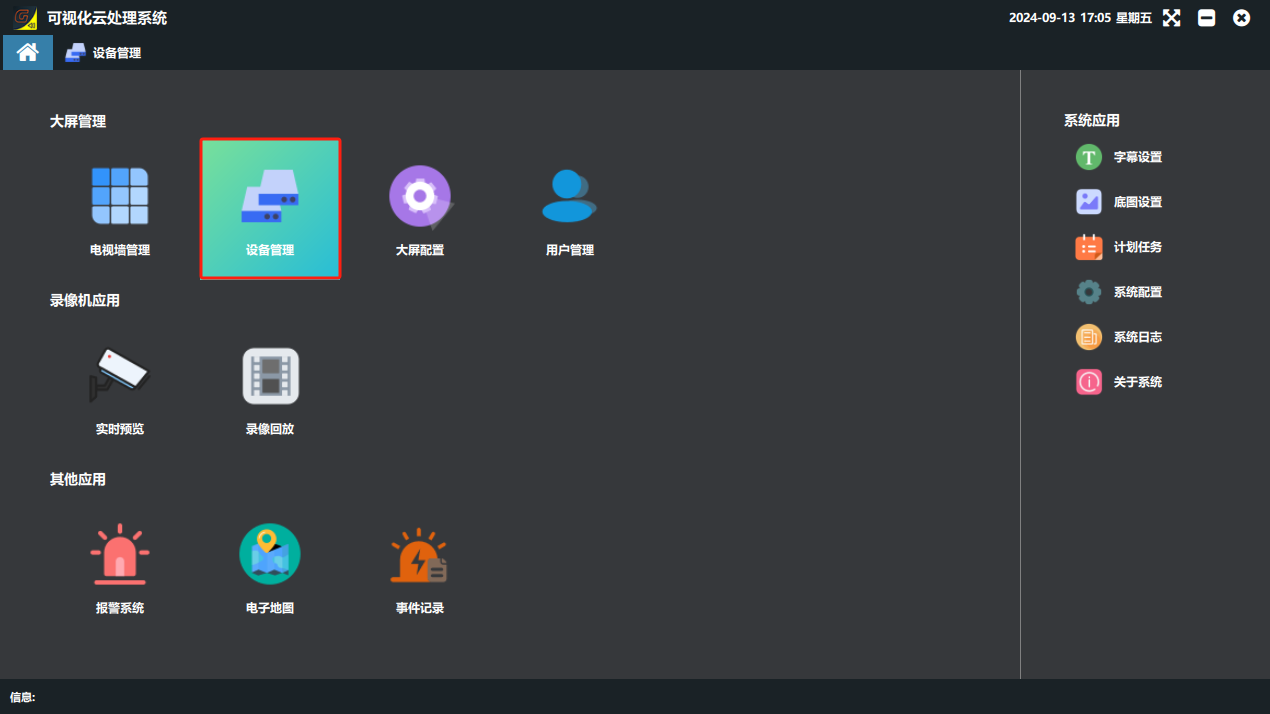
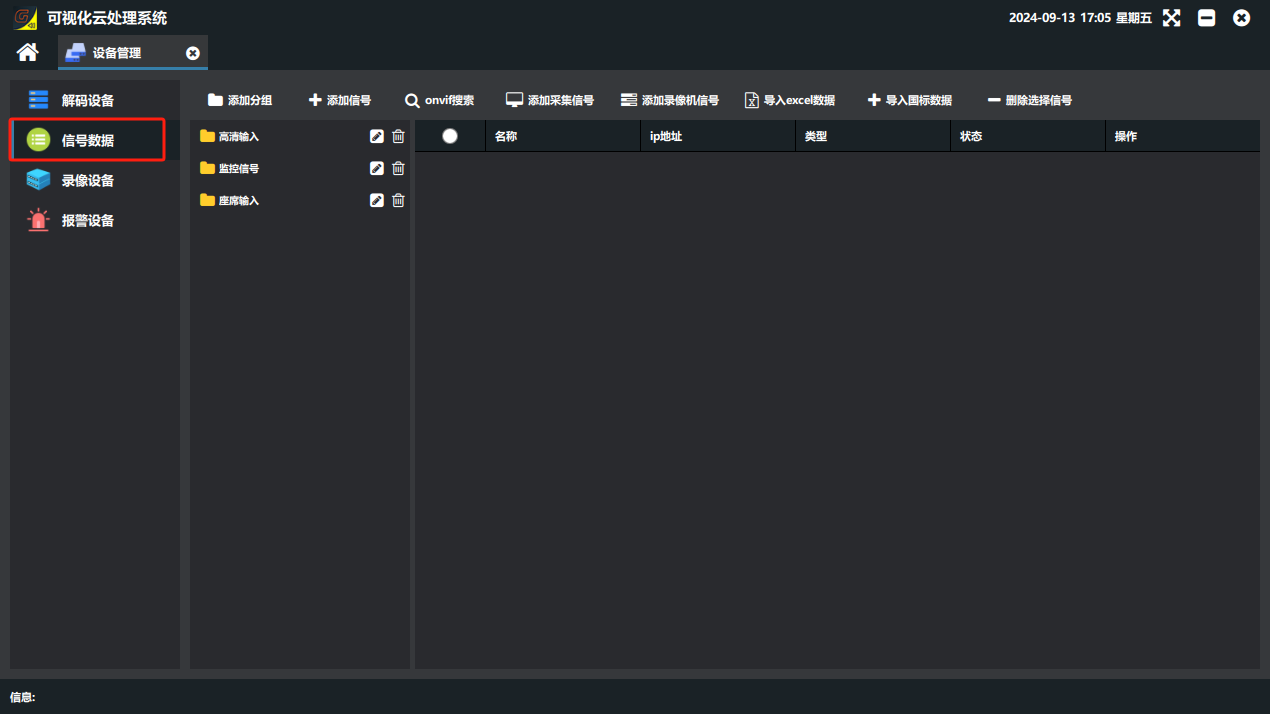
1. Search for and add surveillance signals
⚠️Important: most cameras ship with the ONVIF protocol disabled! If no device is found, first log in to the camera web page to enable ONVIF and create an ONVIF access account.
-
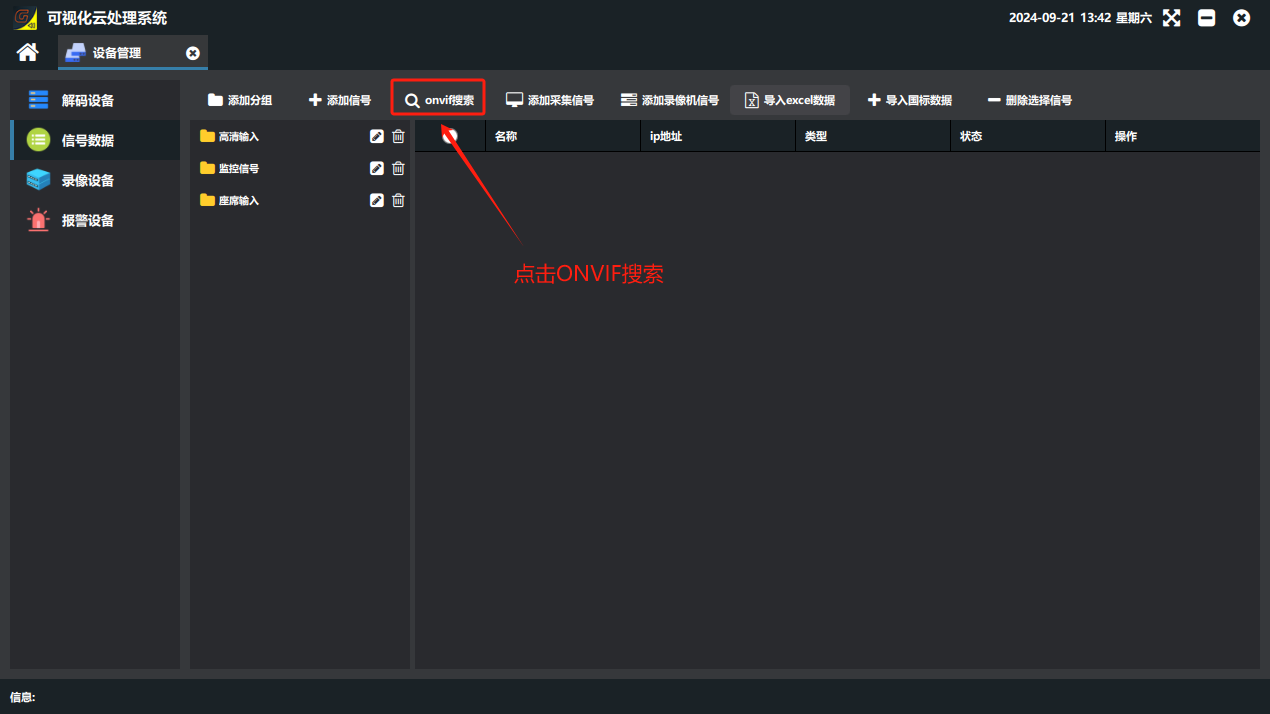
In Device Management → Signal Data, click 【onvif search】;
-
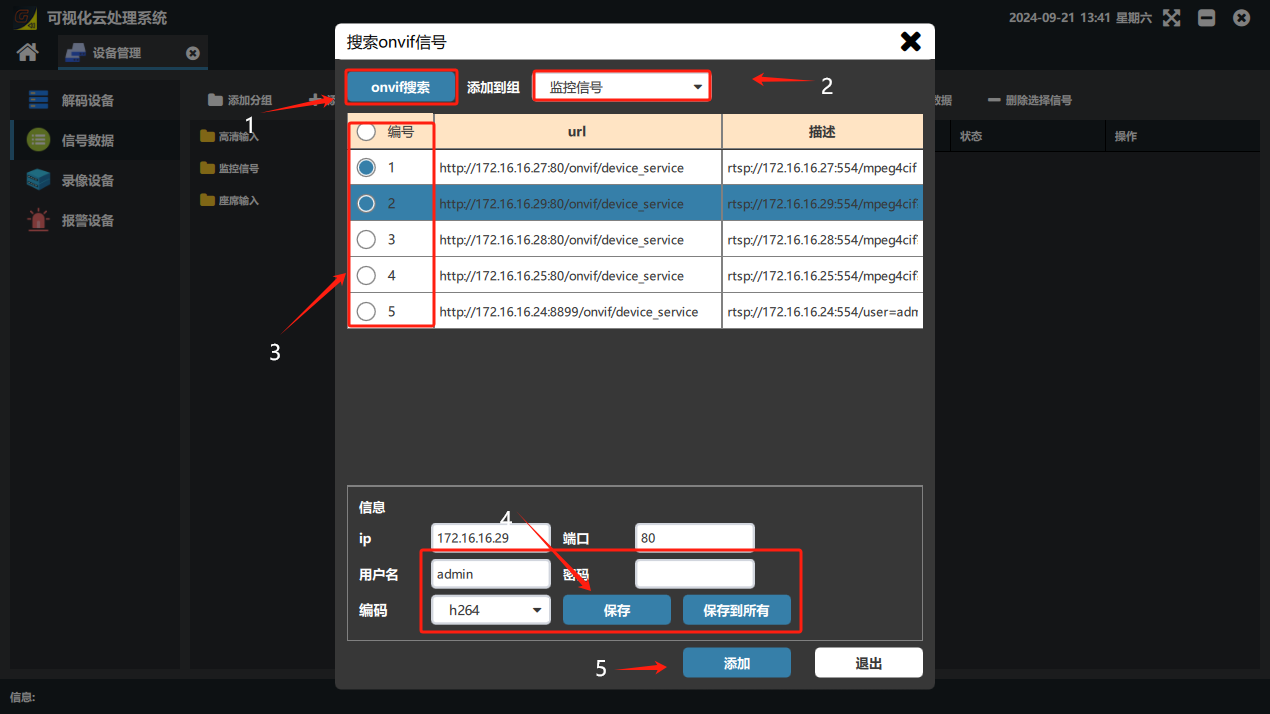
In the “Search ONVIF Signals” window that opens, click “ONVIF Search”
-
Select the group to add to
-
Select the searched surveillance signals to add
-
Fill in the camera account, password and encoding in the information panel, then click Save
-
Click Add
2. Manually add a surveillance signal
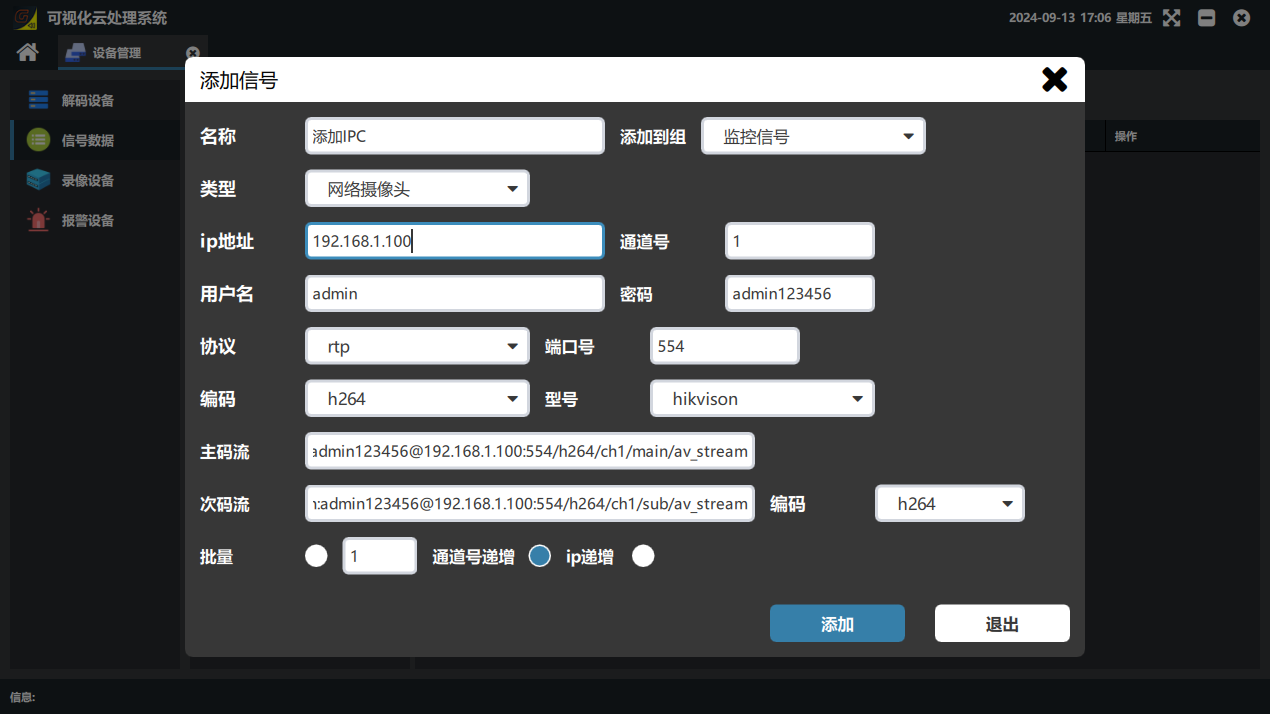
To add a single camera, proceed as shown below.
Note:
Name: enter the required name;
Add to Group: select the group to place it in;
Type: select Network Camera;
IP Address: enter the camera IP;
Channel No.: default “1”;
User Name: the camera login user name;
Password: the camera login password;
Protocol: select “rtp”;
Port: default “554”; if the camera port was changed, enter the changed port;
Encoding: the encoding below “Protocol” is the camera main stream encoding, and the encoding after “Sub Stream” is the camera sub stream encoding; select the encoding according to the actual camera parameters;
Model: select the camera brand.
3. Add cameras in bulk
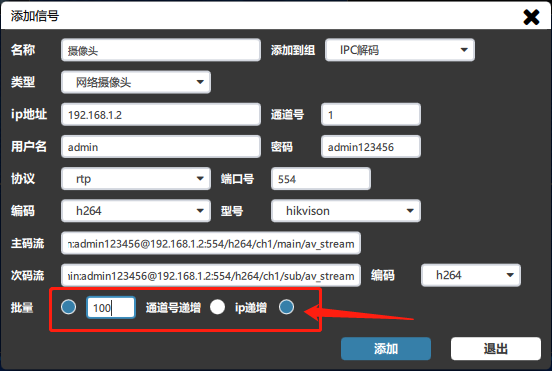
Note: Name: enter the required name.
Add to Group: select the group to place it in.
Type: select Network Camera.
IP Address: enter the starting camera IP.
Channel No.: default “1”.
User Name: the camera login user name.
Password: the camera login password.
Protocol: select “rtp”.
Port: default “554”; if the camera port was changed, enter the changed port.
Encoding: the encoding below “Protocol” is the camera main stream encoding, and the encoding after “Sub Stream” is the camera sub stream encoding; select the encoding according to the actual camera parameters.
Model: select the camera brand.
Bulk: the number of cameras with consecutive IPs to add.
Bulk Option: to add single cameras in bulk, select “IP Increment”.
Self-check when a surveillance signal is black / shows no image after being added:
① verify the camera / NVR user name, password and port (default 554); ② confirm the board IP and the camera / NVR are on the same subnet; ③ confirm the camera encoding is H264/H265 and supported by the processor; ④ if the image stutters or cannot be displayed, switch to the sub stream or lower the stream resolution appropriately.
4. Add surveillance signals from an NVR
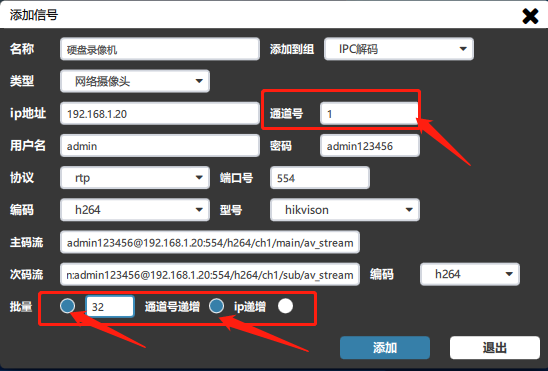
Note: Name: enter the required name.
Add to Group: select the group to place it in.
Type: select Network Camera.
IP Address: enter the NVR IP.
Channel No.: for Hikvision NVRs with 32 channels or fewer (including 32), enter “33”; for Hikvision NVRs with 64 channels or more (including 64) and NVRs of other brands (such as Dahua, Uniview, Xiongmai and so on), the channel number is always the default “1”.
User Name: the NVR login user name.
Password: the NVR login password.
Protocol: select “rtp”.
Port: default “554”; if the NVR port was changed, enter the changed port. (Note: this port is the RTSP protocol port.)
Encoding: the encoding below “Protocol” is the camera main stream encoding, and the encoding after “Sub Stream” is the camera sub stream encoding; select the encoding according to the actual camera parameters.
Model: select the NVR brand.
Bulk: enter the number of NVR channels, or the number of cameras actually connected to the NVR.
Bulk Option: for an NVR, select “Channel No. Increment”.
Did this page help you?One line of feedback helps us keep the steps accurate.