Documents
Connect an NVR
Note: currently only Hikvision, Dahua and Uniview NVRs are supported.
1. Device management
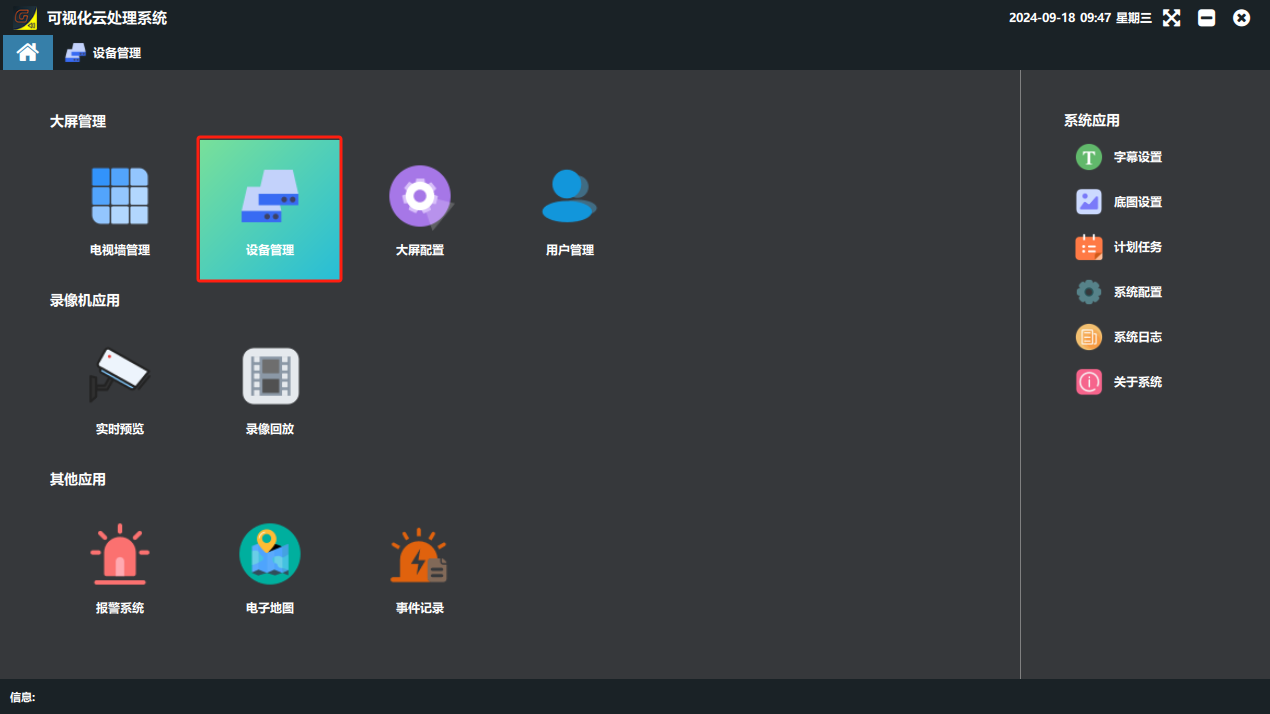
① Click the “设备管理”(Device Management) button.
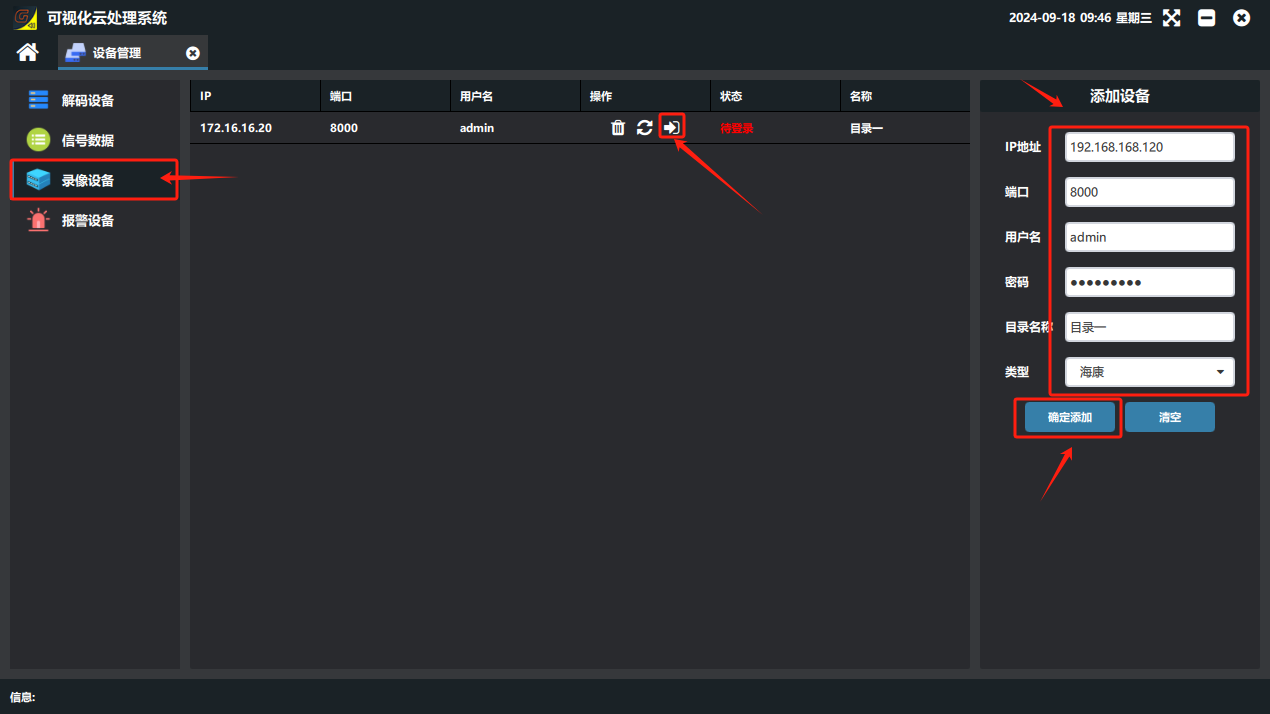
② In the information fields, enter the NVR IP address, user name, password and directory name (the name you want to use) → click “确认添加”(Confirm Add) → the added NVR appears in the device list on the left. Click “登陆”(Log In); if the status column shows “登陆成功”(Login successful), the device was added successfully.
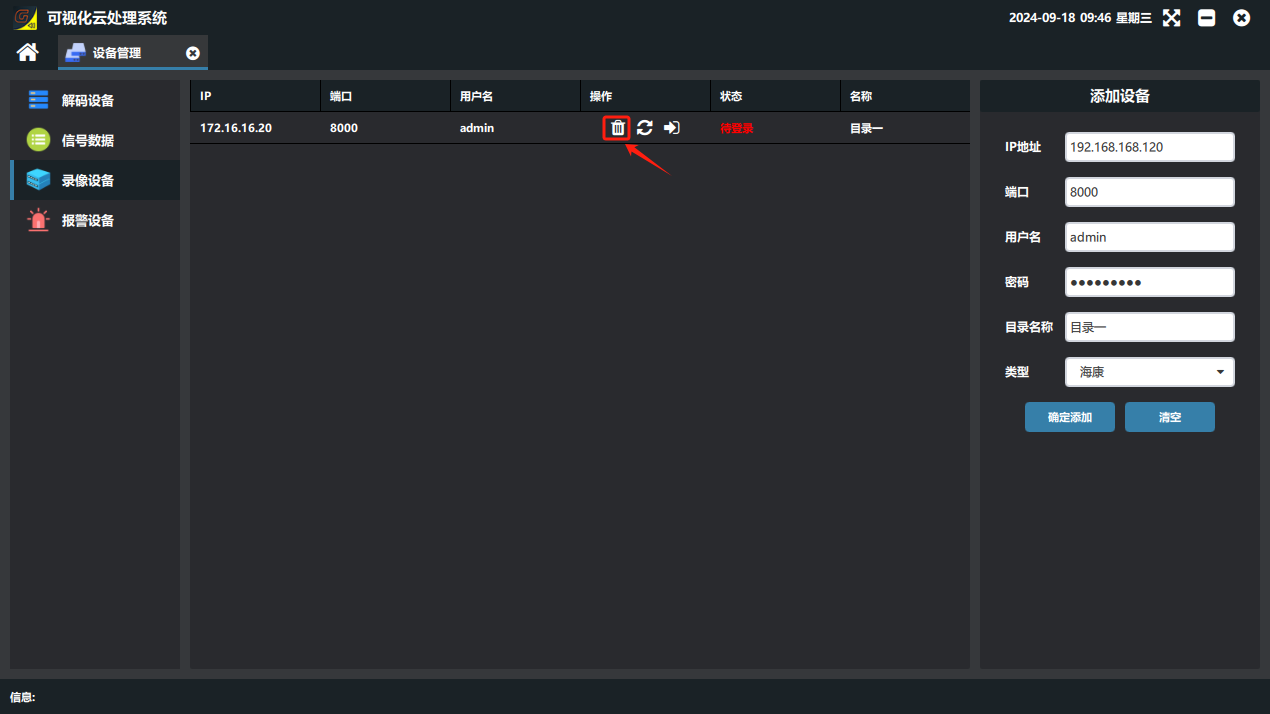
③ To delete a device, just click the “” button in the operation column.

2. Monitoring view
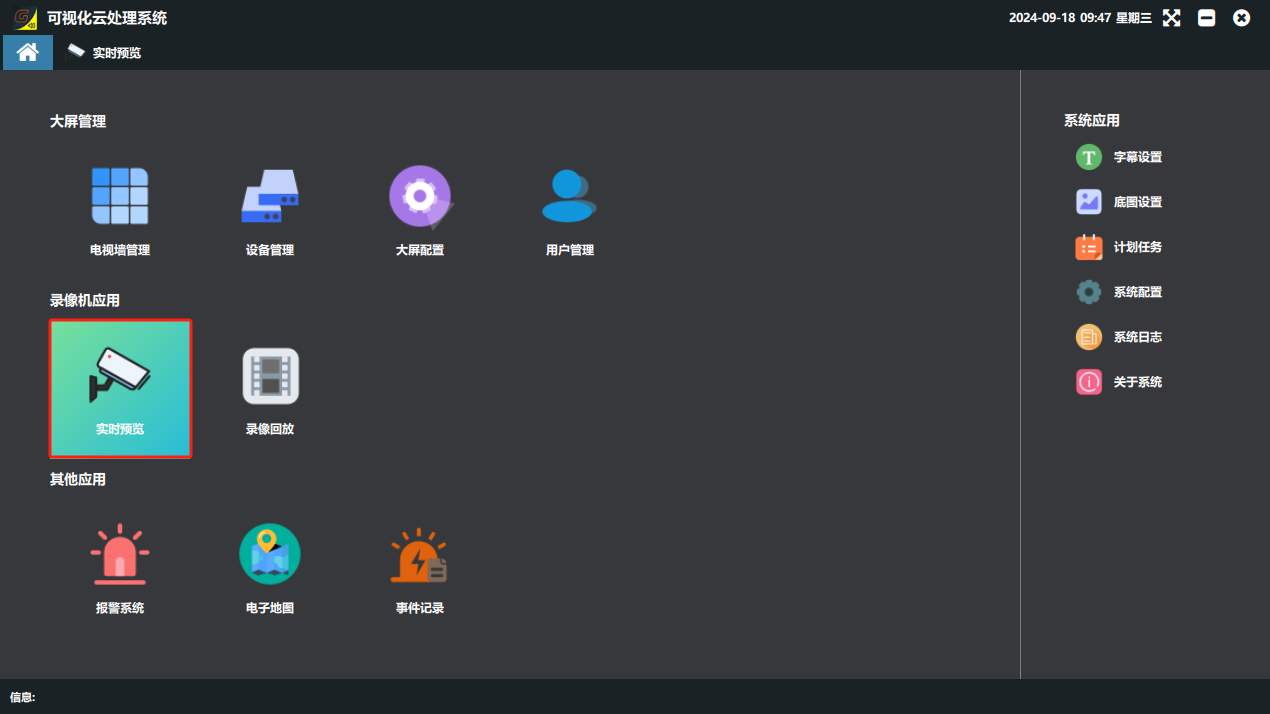
① Click the “实时预览”(Real-time Preview) button. (If the device list is empty, the NVR is not logged in. Go to “设备管理”(Device Management), click “登录”(Log In) and wait until the status bar shows “登录成功”(Login successful), then return to the “监控查看”(Monitoring View) page and the signal source list will contain signal sources.)
② On the “监控查看”(Monitoring View) page you can view the cameras of the added NVR. Select the grid layout for the view, select the cell where the picture should be shown, and double-click a 信号源(Signal Source) to display the camera picture. (Note: viewing camera pictures on the “监控查看” page does not affect the image normally shown on the video wall.)
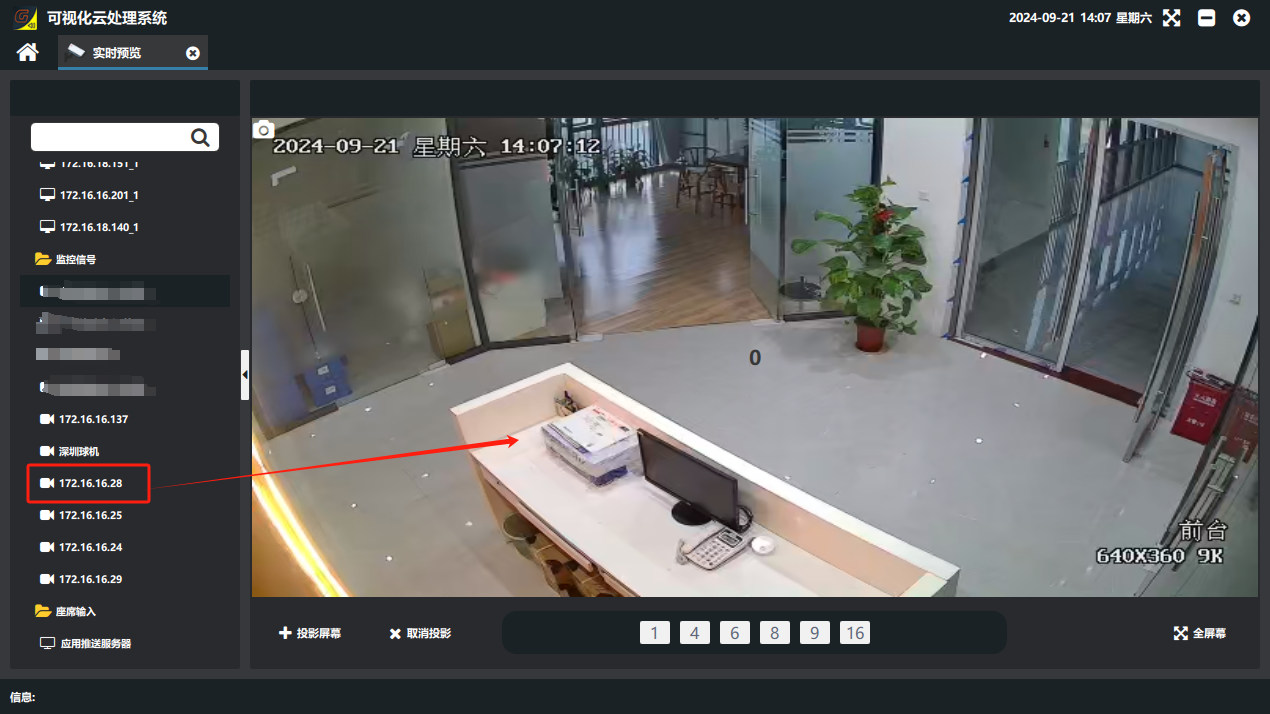
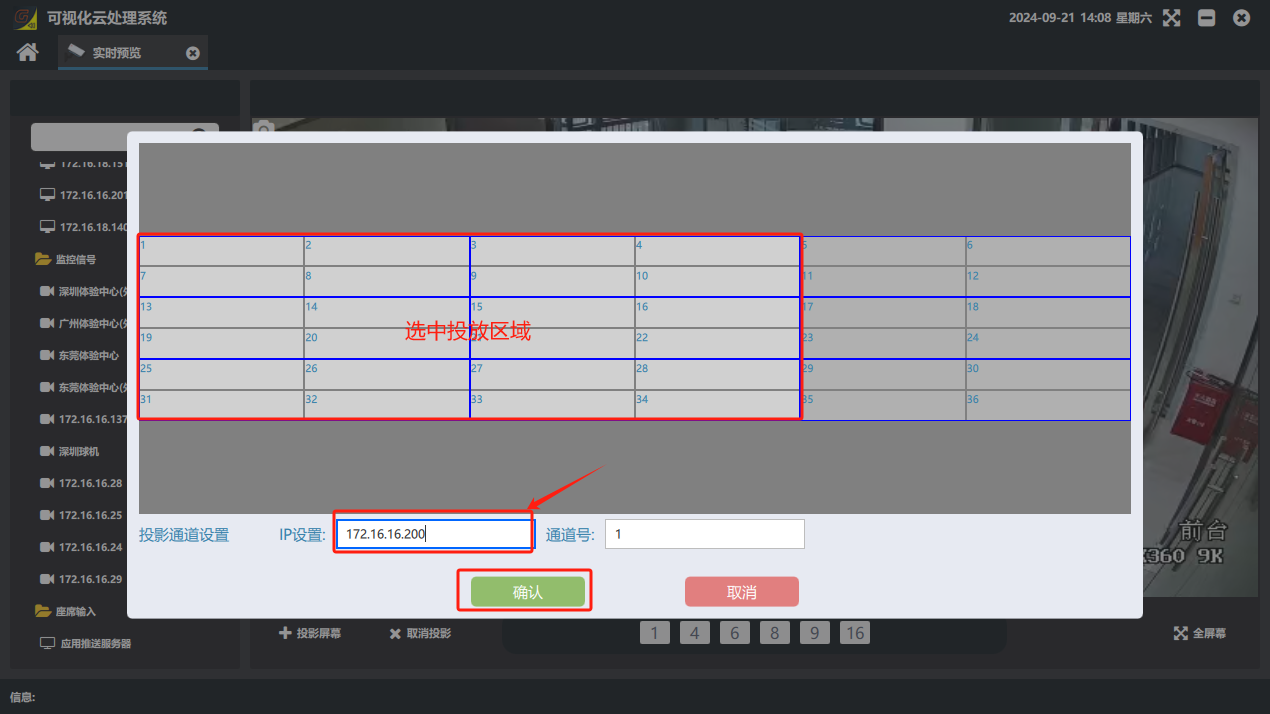
If you want to send the page currently being viewed to the video wall, click “投影屏幕”(Project Screen) → in the “ip 设置”(ip settings) field, set the ip of the HDMI input card connected to the current main control PC → select the projection display area → click “确认”(Confirm). (If projection is not needed, click “取消投影”(Cancel Projection).) Note: this function requires the PC HD cable to be connected to the device input port; what is projected is the PC screen.
3. Record playback
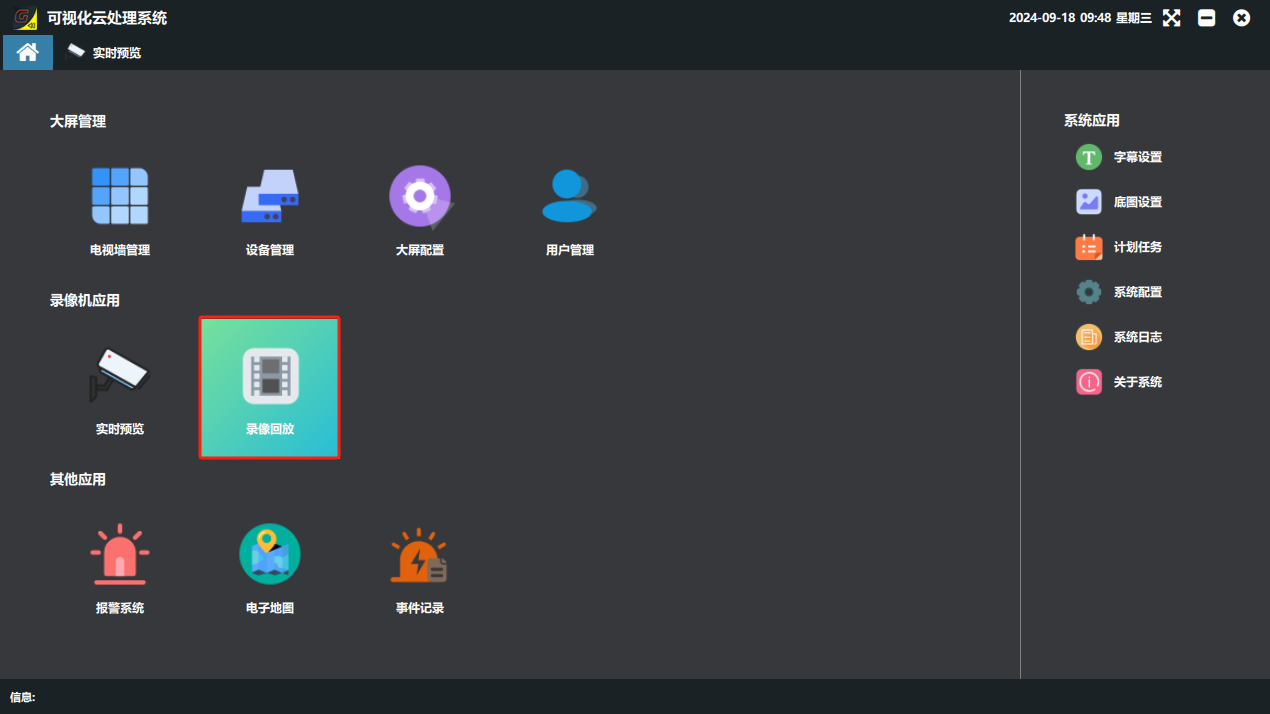
① Click the “录像回放”(Record Playback) button. (If the device list is empty, the NVR is not logged in. Go to “设备管理”(Device Management), click “登录”(Log In) and wait until the status bar shows “登录成功”(Login successful), then return to the “录像回放”(Record Playback) page and the signal source list will contain signal sources.)
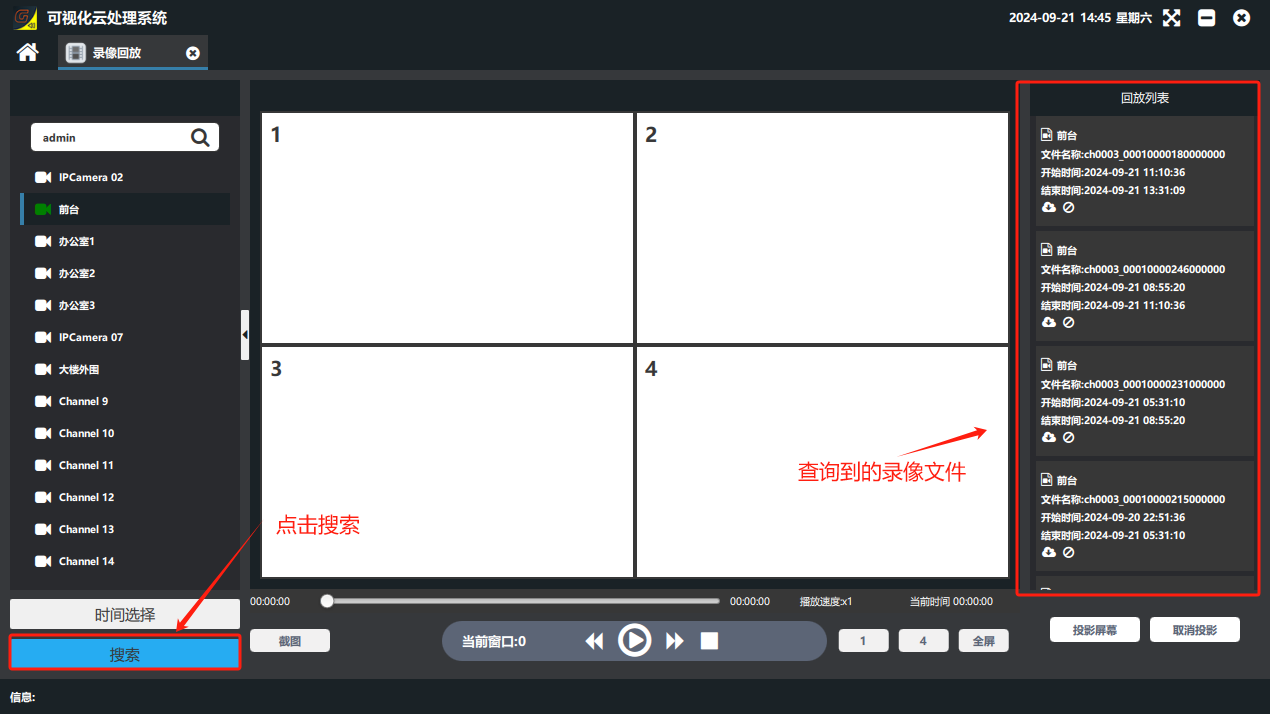
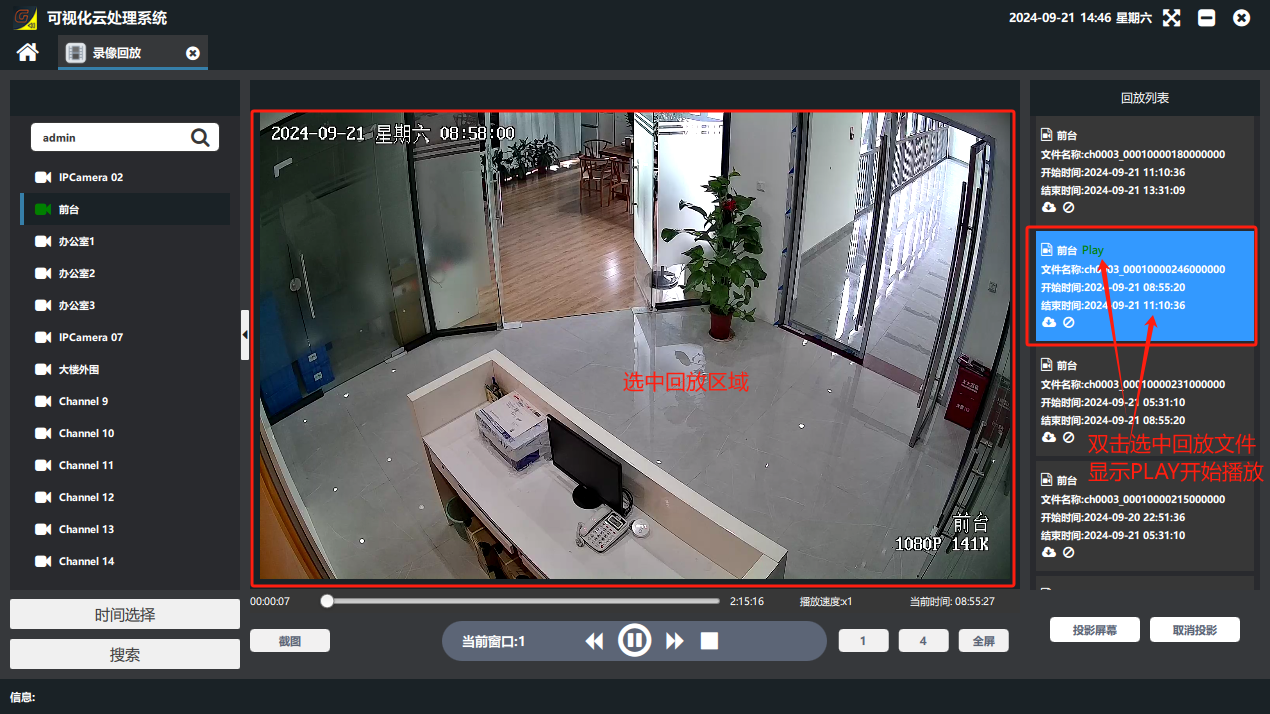
② On the “录像回放”(Record Playback) page, double-click the camera to view → click “时间选择”(Time Selection) and choose the time range to view → click “搜索”(Search) → select the playback display position → double-click the record file to play, and the record playback is displayed.
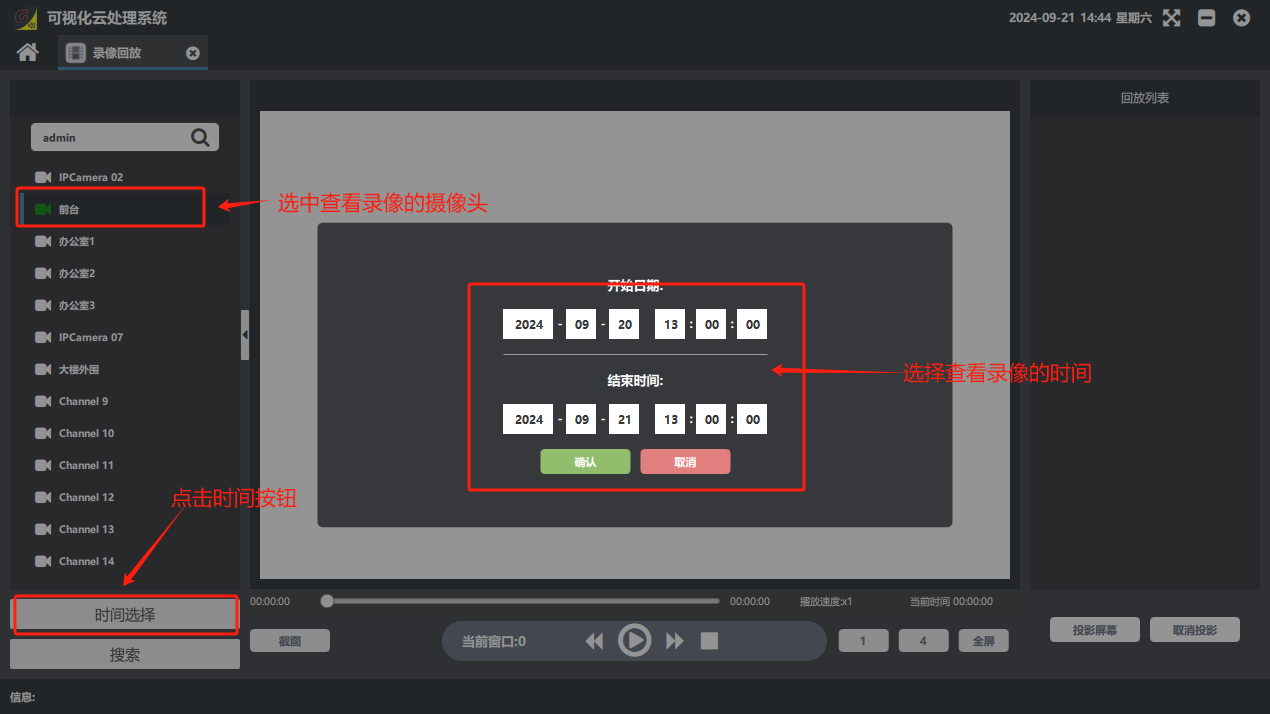
③ If you want to send the record playback page currently being viewed to the video wall, click “投影屏幕”(Project Screen) → in the “ip 设置”(ip settings) field, set the ip of the HDMI input card connected to the current main control PC → select the projection display area → click “确认”(Confirm). (If projection is not needed, click “取消投影”(Cancel Projection).)
Did this page help you?One line of feedback helps us keep the steps accurate.